
Because of an embedded OSGi container (Apache Felix) and a growing set of extension points Communote can be customized easily with the help of OSGi bundles, or how we call them: plugins. With these plugins, which can be added and removed at runtime, it is for instance possible to:
- add custom CSS or replace existing templates and thus, create your your own theme,
- add your own JavaScript components to modify the behavior of the frontend,
- add your own controller for a specific URL,
- hook into the creation and rendering of notes and augment them with additional information,
- provide a new authentication mechanism,
- add your own languages and translations.
The next chapters will walk you through the creation of such a plugin and will show you some of the extension points. The full source code of this tutuorial can be found in the communote-examples repository.
2.1.1 Create a Plugin
The easiest way to create a new plugin is to use Maven’s Archetype mechanism.
- Make sure your development system is prepared. See preparation section for details. You should also install a Communote for testing your plugin.
- Open a command line
- Change to the folder in which you want to create the plugin
-
Call the following command (change the values for groupId, artifactId, version and communoteVersion to your needs):
mvn archetype:generate -DarchetypeGroupId=com.communote.plugins -DarchetypeArtifactId=communote-plugin-archetype -DarchetypeVersion=1.1 -DgroupId=yourGroupId -DartifactId=yourPluginsArtifactId -Dversion=1.0-SNAPSHOT -DcommunoteVersion=3.5where the parameters have the following meaning.
archetypeGroupId,archetypeArtifactIdandarchetypeVersiondefine that the Communote plugin archetype in Version 1.1 should be usedgroupIddefines the groupId of the Maven project of your Communote pluginartifactIddefines the artifactId of the Maven project of your Communote pluginversion(optional) defines the version of the Maven project of your Communote plugincommunoteVersiondefines the version of Communote you want to build your plugin against
The last 4 parameters can be omitted. In that case you will be asked by Archetype to type in the values.
After running the command a new directory will be created in your current working-directory. This directory contains a Maven project for developing your Communote plugin. You can already build this plugin by changing into the directory and invoking mvn on the command line. This will create the plugin, a JAR file, in the target directory. Although, it doesn’t do much, it can already be deployed to your Communote. How this can be done is explained in our installation manual.
2.1.2 Example 1 - Extend Note Rendering
In this example we will show you how the note rendering can be modified. We will define two placeholders named [logo] and [github] which when used in the body of a note will be replaced by our plugin with the Communote logo and a link to our GitHub page. Furthermore, we want to define an alternative text for the logo and a text for the link which can be localized.
Before you start maybe it’s good to create a message via JavaScript, which will show the user that your Communote is under construction.
-
To generate such a construction message you have to create a JavaScript file
construction.jsatsrc/main/resources/META-INF/resources/static/javascript:// Jumps in when the namespace communote is defined and the main layout is loaded if (window.communote && communote.environment && communote.environment.page == 'main') { // Add a callback that is invoked before the Communote JavaScript component is initialized communote.initializer.addBeforeInitCallback(function() { //... this snippet creates a container with a localized message and appends it to the top var constructionContainer = new Element('div', { id: 'construction-container', html: '<h1>' + communote.i18n.getMessage("plugins.communote.tutorial.construction.text") + '</h1>' }); constructionContainer.inject($('cn-view-wrapper'), 'top'); }); }With the
communote.i18n.getMessage()function you can get a localized text which is identified by the key given as argument. - You need to create a properties file at
src/main/resources/META-INF/resources/i18nto store the keys and a translation:-
messages_en.properties(for the English translation) and insert the following line. The keys of the messages of your plugin should be unique so that another developer does not unintentionally overwrite them.plugins.communote.tutorial.construction.text=Warning! Your Communote is right now under construction. -
messages_de.properties(for the German translation) and insert:plugins.communote.tutorial.construction.text=Achtung! Ihr Communote ist gerade im Aufbau.
-
-
But you are not yet able to use this message key in the JavaScript context. You will first have to expose it with a special extension point. Therfore, go to your plugin and look for a directory which contains the file
Activator.javafile. Now delete this file because it is not needed in this example and create a Java file namedTutorialJsMessages.javainstead. Add the following content (and the package and import statements which we omitted for better readability) to it.@Component @Provides @Instantiate public class TutorialJsMessages implements JsMessagesExtension { @Override public Map<String, Set<String>> getJsMessageKeys() { HashSet<String> messageKeys = new HashSet<String>(); // Add the message keys you need to access via your JavaScript file messageKeys.add("plugins.communote.tutorial.construction.text"); HashMap<String, Set<String>> mapping = new HashMap<String, Set<String>>(); // Define the context where you have access to the message keys mapping.put(JsMessagesRegistry.CATEGORY_PORTAL, messageKeys); return mapping; } } -
You also need to let Communote know that the JavaScript file of your plugin should be included when the main page of Communote is rendered. This is achieved by creating a JSON file called
javascript-categories.jsoninsrc/main/resources/META-INF/:{ "extensions": { "portal": ["javascript/construction.js"] } } -
Build and and deploy the plugin as explained at the end of the chapter Create a Plugin. Then reload the Communote main page in your browser which should now look like this:
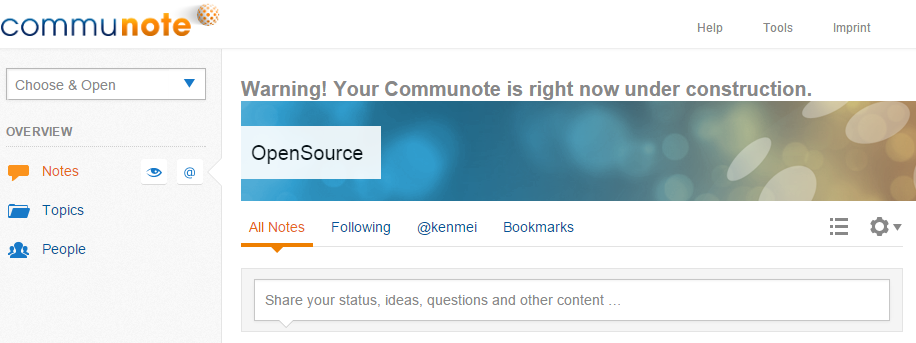
Figure “Result of the construction message with no style”
-
You probably recognized that the construction message have no style. Therefore we create a
style.cssatsrc/main/resources/META-INF/resources/static/styles:#construction-container { background-color: #ee7f01; padding: 15px; text-align: center; } #construction-container h1 { color: #FFFFFF; font-size: 16px; margin: 0; } -
The CSS file needs also to register like the JavaScript files with a JSON file called
css-categories.jsonatsrc/main/resources/META-INF/:{ "extensions": { "portal": ["styles/style.css"] } }If you build and deploy the plugin again it will looks like this:
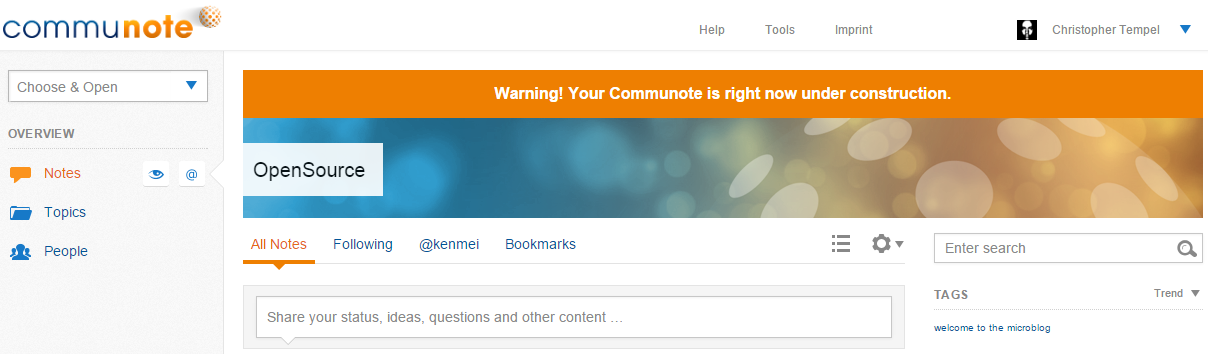
Figure “Result of the construction message with no style”
Now you can start going deeper and extend the note rendering process to manipulate the content of a note.
-
Go to your java folder to create a new java file called
TutorialNoteRenderingPreProcessor.java, that implements theNoteContentRenderingPreProcessorto extend the note rendering process:@Component @Provides @Instantiate(name = "TutorialNoteRenderingPreProcessor") public class TutorialNoteRenderingPreProcessor implements NoteContentRenderingPreProcessor { /** * @return the order value which is interpreted as the priority of the pre-processor. The higher * the priority, the earlier this processor will be called. */ @Override public int getOrder() { return DEFAULT_ORDER; } /** * @return whether the result can be cached. This method has to return false if this * PreProcessor modifies the content in a way that depends on other NoteRenderContext * attributes than the NoteRenderMode (e.g. locale, request attributes or modeOptions). * This PreProcessor should not modify the note metadata (NoteListData object) while * processing the content if this method returns true because the PreProcessor will not * be invoked if the processed content was cached. */ @Override public boolean isCachable() { return true; } /** * Processes a note for a specific render context. This method will only be called if the * processor supports the mode given by the render context. * * @param context * holds details about the render context to allow specific processing in different * situations * @param item * the item to be processed * @return true if the item was modified, false otherwise * @throws com.communote.server.plugins.api.NoteRenderingPreProcessorException * in case something unexpected lead to the failure of the processor */ @Override public boolean processNoteContent(NoteRenderContext context, NoteData item) throws NoteRenderingPreProcessorException { return false; } /** * Denotes whether the pre-processor replaces the note content completely. * * @return true if the processor replaces the content and the shortened content completely. If * the processor only modifies parts of the content or other members of the item, false * should be returned. When replacing content the new content must match the render * mode. */ @Override public boolean replacesContent() { return false; } /** * Whether the processor supports a specific render mode. When returning true and the processor * modifies or replaces the note content it must ensure that it only inserts text which matches * the render mode, specifically the processor shouldn't insert HTML markup when called in PLAIN * mode. * * @param mode * the note render mode, never null * @param note * the note to render. A pre-processor can use this parameter to decide based on note * attributes whether the note content should be processed * @return true if the mode can be handled by the processor, false otherwise */ @Override public boolean supports(NoteRenderMode mode, NoteData item) { return NoteRenderMode.PORTAL.equals(mode); } } -
Define a list of your replacements globally:
// Definition of the replacements list private final static List<Pair<String, String>> REPLACEMENTS = new ArrayList<>(); // On the left side of our pair are the placeholders and on the right side are the HTML replacements static { REPLACEMENTS.add(new Pair<>("[logo]", "<span class=\"communote-logo\"></span>")); REPLACEMENTS.add(new Pair<>("[github]", "<a href=\"http://github.com/communote\">Github Communote</a>")); } -
Jump into the function
processNoteContent(NoteRenderContext context, NoteData item)and you can use theitemobject to get and set the short and full content of a note:public boolean processNoteContent(NoteRenderContext context, NoteData item) throws NoteRenderingPreProcessorException { // Setting the new content of the note delivered by the replacement function item.setContent(processContent(item.getContent())); // ... and do the same for the short preview content item.setShortContent(processContent(item.getShortContent())); return true; } -
You now able to create the new function
processContent(content)with the current content as variable that needs to be replaced:private String processContent(String content, Locale locale) { // Do nothing if the content is null if (content == null) { return null; } // Searching for the "[logo]" and "[github] placeholder to replace them with the HTML defined above for (Pair<String, String> replacement : REPLACEMENTS) { content = content.replace(replacement.getLeft(), replacement.getRight()); } return content; } -
Nearly done. For the image replacement you need a style for the
.communote-logoclass and the logo image.- Upload the
logo.pngatsrc\main\resources\META-INF\resources\static\images`` -
Add to your CSS file
style.cssthe following class:.communote-logo { background-image: url("../images/logo.png"); display: inline-block; height: 16px; width: 106px; }
- Upload the
-
Build and redeploy your plugin again. After reloading your Communote main page you should see this:
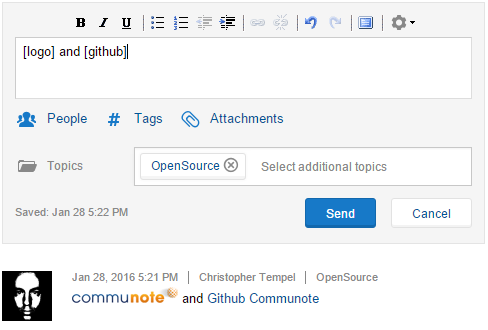
Figure “Result for Example 1 - Extend Note Rendering”
2.1.3 Example 2 - Create a view with a widget
This example will explain you how to create a view at the notes overview with one simple widget on it.
-
At the horizontal navigation next to the bookmarklet link we want to register a new view with a widget as content. Lets start at your
resources/static/javascriptfolder and place a new javascript fileCreateHelloWorldView.jsin it:// Jumps in when the namespace communote is defined and the main layout is loaded if (window.communote && communote.environment && communote.environment.page == 'main') { // Add a callback that is invoked before the Communote JavaScript component is initialized communote.initializer.addBeforeInitCallback(function() { var widgets, views; // parentViewId defines where the new subview should be added (other parent views defined by // the core are for example topicsOverview or topicSelected) var parentViewId = 'notesOverview'; // Name of the new subview var viewName = 'helloWorld'; var subViewName = parentViewId + '_' + viewName; // Register view link to horizontal navigation bar communote.configuration.mainPageContexts[parentViewId].push(viewName); // Get list of all views views = communote.configuration.mainPageViewManagerConfig.views; // Add the new view to the list of views views[subViewName] = { // When the user changes the view and 'hide' is defined the view container will be hidden. // Another option is 'delete' for deleting it from the DOM previousViewAction: 'hide', // List all the widgets that should be shown in the new view visibleWidgets: ['EntityChooser','VerticalNavigation', 'HorizontalNavigation', 'GlobalIdShowBannerImage', 'HelloWorld'] // You can also add parentViewId: 'insertMainView' as an option // to extend the visible widgets of a main view } // Get list of all widgets widgets = communote.configuration.mainPageViewManagerConfig.widgets; // Add our HelloWorld widget to the list of all registered widgets widgets['HelloWorld'] = { // The widgetType is used to identify the Java and JavaScript widget class. Moreover, // a CSS class with that name is added to the container of the widget. widgetType: 'HelloWorldWidget', // The CSS selector defines where the widget should be injected containerSelector: '#cn-list-posts' }; }); } - Localize the name of the new horizontal navigation point via the message properties:
-
messages_en.propertiesmainpage.horizontal.navigation.notesOverview.helloWorld=Hello World! -
messages_de.propertiesmainpage.horizontal.navigation.notesOverview.helloWorld=Hallo Welt!
The key
notesOverviewstands for the parent view andhelloWorldfor our new subview. -
- In step 1 we also add a new widget to the view. A widget needs a Java and a JavaScript class.
-
Lets start with the Java class
HelloWorldWidget.javawhich needs to created at your Java folder:public class HelloWorldWidget extends EmptyWidget { @Override public String getTile(String outputType) { // key of the vm.tiles-mappings.properties entry whose value holds // the path of the velocity file which should be rendered return "com.communote.tutorial.HelloWorld.widget"; } } -
The tiles are mapped at the file
resources/META-INF/vm.tiles-mappings.properties:com.communote.tutorial.HelloWorld.widget=/vm/widget/HelloWorld.Widget.html.vm -
The linked Velocity file
HelloWorld.Widget.html.vmneeds to be placed atresources/META-INF/resources/vm/widget/and have the following content:## ## $widgetInstance -> via the widget instance it is possible to access functions and variables of the JavaScript widget object ## #set($widgetInstance = "#jsCurrentWidget()") <div class="cn-form-container"> <div class="cn-field-50"> <label class="cn-label" for="${widget.WidgetId}_message"> ## In order to internationalize your code use the helper functions #t(key) and #t_args(key, arguments) #t('plugins.communote.tutorial.widget.HelloWorld.input.label') </label> <input type="text" class="cn-inputTxt" id="${widget.WidgetId}_message" name="${widget.WidgetId}_message" /> </div> <div class="cn-buttons"> ## Using the widget instance to define an onclick event for the button <input type="button" id="${widget.WidgetId}-show" name="${widget.WidgetId}-show" class="cn-button main" value="#t('plugins.communote.tutorial.widget.HelloWorld.button')" onclick="${widgetInstance}.showSuccessMessage()"/> </div> </div>With this widget template the user can write a text and click on the button to generate it as a Communote notification.
-
In this case we your JavaScript folder you can create the widget class
HelloWorld.Widget.js:(function(namespace) { var HelloWorldWidget = new Class({ Extends: C_Widget, /* First part "plugin/" is required and marks the widget as one that is provided by a plugin. The maven placeholder is needed to create an unique widget group name based on the name of the OSGi bundle and will be replaced when building the plugin. */ widgetGroup: 'plugin/${maven-symbolicname}', //This function prints out the input value via a notification showSuccessMessage: function() { var message = this.domNode.getElementById(this.widgetId + '_message').get('value') showNotification(NOTIFICATION_BOX_TYPES.success, null, message); } }); // to register the widget constructor within the Communote namespace namespace.addConstructor('HelloWorldWidget', HelloWorldWidget); })(window.runtimeNamespace); -
You need to edit your pom.xml file and configure the filter process to get the maven placeholder to be replaced:
...
<defaultGoal>package</defaultGoal>
<resources>
    <resource>
        <directory>src/main/resources</directory>
        <filtering>true</filtering>
        <includes>
            <include>**/*.vm</include>
            <!-- to replace maven placeholders in Widget files -->
            <include>**/javascript/*.js</include>
            <include>**/error_*.html</include>
        </includes>
    </resource>
    <resource>
        <directory>src/main/resources</directory>
        <filtering>false</filtering>
        <excludes>
            <exclude>**/*.vm</exclude>
            <exclude>**/javascript/*.js</exclude>
            <exclude>**/error_*.html</exclude>
        </excludes>
    </resource>
</resources>
...
In order to filter also the minified JavaScripts add this plugin:
<plugin> <groupId>org.codehaus.mojo</groupId> <artifactId>build-helper-maven-plugin</artifactId> <executions> <execution> <id>add-minimized-css-and-js</id> <phase>generate-resources</phase> <goals> <goal>add-resource</goal> </goals> <configuration> <resources> <resource> <!-- add bundle name to widgetGroup for minimized files --> <directory>src-gen/minimized</directory> <filtering>true</filtering> <includes> <include>**/*Widget-min.js</include> </includes> </resource> <resource> <directory>src-gen/minimized</directory> <filtering>false</filtering> <includes> <include>**/*-min.js</include> <include>**/*-min.css</include> </includes> <excludes> <exclude>**/*Widget-min.js</exclude> </excludes> </resource> </resources> </configuration> </execution> </executions> </plugin> -
It is time to register both JavaScript files at your plugin in the
javascript-categories.jsonatresources/META-INF/:{ "extensions": { "portal": [ "javascript/HelloWorld.Widget.js", "javascript/CreateHelloWorldView.js"] } } -
We used some translation keys at the widget velocity template you need to add:
-
messages_en.propertiesplugins.communote.tutorial.widget.HelloWorld.input.label=Type in your message plugins.communote.tutorial.widget.HelloWorld.button=Show Message -
messages_de.propertiesplugins.communote.tutorial.widget.HelloWorld.input.label=Deine Nachricht plugins.communote.tutorial.widget.HelloWorld.button=Nachricht senden
-
-
-
Now we need an widget factory class
TutorialWidgetFactory.javafor our plugin in your Java folder. This factory creates an instance of our widget with the given widget group and widget type name:@Component @Instantiate public class TutorialWidgetFactory implements WidgetFactory { private final String symbolicName; /** * Constructs the widget factory * * @param bundleContext * the context of the bundle */ public TutorialWidgetFactory(BundleContext bundleContext) { // Saving the context of the plugin to stop and start the factory this.symbolicName = bundleContext.getBundle().getSymbolicName(); } /** * Create a new widget instance that should handle the current widget request. * * @param widgetGroupName * the group of the widget * @param widgetName * the name of the widget * @param requestParameters * the request parameters of the current request * @return the new widget instance * @throws WidgetCreationException * in case the widget cannot be created */ @Override public Widget createWidget(String widgetGroupName, String widgetName, Map<String, String[]> requestParameters) throws WidgetCreationException { // Return the new widget instance return new HelloWorldWidget(); } /** * Plugin start callback to register the factory. */ @Validate public void start() { WebServiceLocator.instance().getService(WidgetFactoryRegistry.class) .addWidgetFactory(this.symbolicName, this); } /** * Plugin stop callback to remove the factory. */ @Invalidate public void stop() { WebServiceLocator.instance().getService(WidgetFactoryRegistry.class).removeWidgetFactory( this.symbolicName); } } -
Done!

Figure “Result for Example 2 - Create a view with a widget”
2.1.4 Other Plugin examples
You can download and look through other plugins like:
- Communote remote user authentication plugin
- Communote content replacement plugin
- or any other plugin repository (starting with communote-plugin-*) of our GitHub account
2.1.5 Platform Extension Points
1.2.5.1 Extend Notes, Tags, Users
| What to extend | Class/Interface |
|---|---|
| Note content before stored This interface allows to edit the content of a note before it is stored at the database. |
NoteStoringEditableContentPreProcessor |
| Note metadata before stored This interface allows to edit the metadata of a note before it is stored at the database. |
NoteStoringImmutableContentPreProcessor |
| Note content rendering Allows to execute logic after the note is saved. At the point of manipulation the note is already stored at the database. The process is working async. Overwrite the processNoteContent() and manipulate the content with their getter and setter functions of the item object. |
NoteContentRenderingPreProcessor |
| Note metadata rendering Allows to execute logic after the note is saved. At the point of manipulation the note is already stored at the database. The process is working async. Overwrite the processNote() and manipulate the metadata with their getter and setter functions of the item object. |
NoteMetadataRenderingPreProcessor |
| Note user notification (@user) Allows you to control if the user receiving a notification by overwriting the function preProcess(). |
UserNotificationNoteProcessor |
| Note topic notification (@@all, @@authors and @@managers) Allows you to control if the users of a topic receiving a notification by overwriting the function preProcess(). |
NotificationNoteProcessor |
| Tag suggestions A TagSuggestionProvider allows searching for tags in arbitrary systems. The results will be shown to the user as suggestions. |
TagSuggestionProvider |
| Note attachments Processor to process attachments before they will finally be stored. |
AttachmentStoringPreProcessor |
| New note format Extension for the ChronologicalPostList widget which provides means to render the HTML of a note with another template. As an example take a look into the ActivityNoteItemTemplateProvider. |
CPLNoteItemTemplateProvider |
| Add note meta data Extension for the {@link ChronologicalPostListWidget} which allows adding meta-data to a note which should be available in the JavaScript frontend, for example in a NoteActionHandler or a note click handler. |
CPLNoteMetaDataProvider |
| Add note functions Extension for the ChronologicalPostListWidget which allows adding or replacing actions of a note. This extensions just provides the names of the actions. Additionally message keys for the actions which adhere to the following naming conventions must be provided and exposed to JavaScript:
NoteActionHandler of the widget. |
CPLNoteActionsProvider |
| Tag store Add an own tag store |
TagStore |
| User preferences Allows to store own user preferences. Implementing class must have an empty constructor to allow instantiation while runtime. |
UserPreference |
| External user repository It is possible to integrate a own user repository. |
ExternalUserRepository |
| Content type This class allows to add new content types to Communote, for instance "Video", "Image" or "Document". Content types can be used in conjunction with the ContentTypeWidget to allow filtering for content types. |
ContentTypeWidgetExtension |
2.1.5.2 Administration Page
An own page at the administration is possible via an AdminController. For an example take a look at the AdminController of this plugin: #Todo: Link zum {AdminstrationPluginSample}
Extend the AdministrationViewController and implement the Controller Interface.
2.1.5.3 Events
Implement the interface com.communote.server.events.EventListener<Your Event Type> to extend your Event.
| What to extend | Event Type |
|---|---|
| Topic created Event to notify about new topics. |
ExternalUserRepository |
| Role changed Event to notify about a change of a blog role of a user. This covers all roles that have been assigned to the user either directly or indirectly through group membership. The reason for the event can be that the role was added, removed or modified. |
AssignedBlogRoleChangedEvent |
| Discussion changed Event, which is fired, when a discussion as changed. |
DiscussionChangedEvent |
| Topic Hierarchy Connections changed Event, which is fired, when a topic is added or removed at the topic hierarchy. |
TopicHierarchyEvent |
| Property changed Fired if property of any entity is created, updated or deleted. Check available types of properties at com.communote.server.core.property.PropertyType |
PropertyEvent |
| Status of a user changed Event that is fired the status of a user was changed. |
UserStatusChangedEvent |
2.1.5.4 JS Hooks
Initializer Callbacks
Helper to initialize the application. The component provides different hooks to do custom initializations at different points during startup and is exposed in the communote namespace as communote.initializer.
| What to extend | Callback Function |
|---|---|
| After initialization complete Add a callback function that will be called after the initialization completed. If the widget framework should be initialized this callback will be invoked after any callback added with addWidgetFrameworkInitializedCallback.
|
communote.initializer.addAfterInitCallbacks |
| Before initialization Add a callback function that will be called before doing any kind of initialization. |
communote.initializer.addBeforeInitCallbacks |
| After Widget Framework initialization Add a callback function that will be called after the widget framework was initialized. |
communote.initializer.addWidgetFrameworkInitializedCallbacks |
| After scanning widgets Add a callback function that will be called after scanning for widgets during page load. |
communote.initializer.addAfterWidgetScanCallbacks |
| Before scanning widgets Add a callback function that will be called before scanning for widgets during page load. |
communote.initializer.addBeforeWidgetScanCallbacks |
| After everything Add a callback function that will be called after everything (initializations and widget scan if required) is ready. If called after initApplication was called the callback will be invoked directly. |
communote.initializer.addApplicationReadyCallbacks |
Configurations
| What to extend | Objects |
|---|---|
| View registration New views can be added to the mainPageViewManagerConfig.views object. It is possible to extend a view (via parentViewId as parameter) or create a view from scratch.
|
communote.configuration.mainPageViewManagerConfig.views |
| Widget registration New widgets can be added (without the "Widget" suffix) to the mainPageViewManagerConfig.widgets object with the following parameters:
|
communote.configuration.mainPageViewManagerConfig.widgets |
| Navigation registration Add a link of a view into the navigation (horizontal or vertical). Set the main view via the parent view ID like for example notesOverview, topicSelected or userEdit and push the view ID of the new view to it.
The localized frontend name of the navigation point can be set via the message key mainpage.horizontal.navigation.{Parent View ID}.{View ID}
|
communote.configuration .mainPageContexts[Parent View ID].push(View ID) |
| Default render options for widgets at views It is possible to change the render options for widgets in a view. You can hide for example the tag cloud in the notes overview per default. |
communote.configuration.factory.defaultNoteViewRenderOptions |
2.1.5.5 Overwrite Templates
It is possible to overwrite all the templates registered at the core.vm.tiles-mappings.properties (#ToDo: Link) with an own vm.tiles-mapping.properties file but it cannot be recommended. In the worst case the custom template stops working when a core update alters the overwritten template.